Sell on Facebook Page: One of the latest and trending services made available by Facebook is the service that lets you sell items on a Facebook page. Do you think it is impossible to do that? Of course not! Everything that you need to do this has been easy to use and access. You may begin to ask yourself, why do I have to sell items on a Facebook page? Do you have that though right now? If you do, then you should know that Facebook really serves as that best hub where you can sell your business to lots and lots of people.
As everyone knows, Facebook is a messaging, entertaining and information site that is used by billions of people all over the world. And with billions of people as members on this platform, it is sure said that you can surely get your business to those billions of people. But the thing right now is, how can i begin to sell items on a Facebook page.
Open Your Facebook Account
Opening your Facebook account is the very first step you have to pass through in getting your business on a Facebook page, as the Facebook account enables you to also become a member of the Facebook site. So, if you are ready to begin on the service that allows you to sell items on a Facebook page, then you will surely need an account to get started.
Log in To Facebook
Your account is now open, you should know that. But you still need to log to make use of your account. Have you opened an account? Then you can now log in to make use of it.
Now you have gotten a Facebook account, and you also know how to login to this account. you can begin to sell items on a Facebook page. Now there are two things involved, it is either you sell on other pages or create your own page to sell on. I will list out how you can sell on other pages. And without much ado, let’s quickly get started.
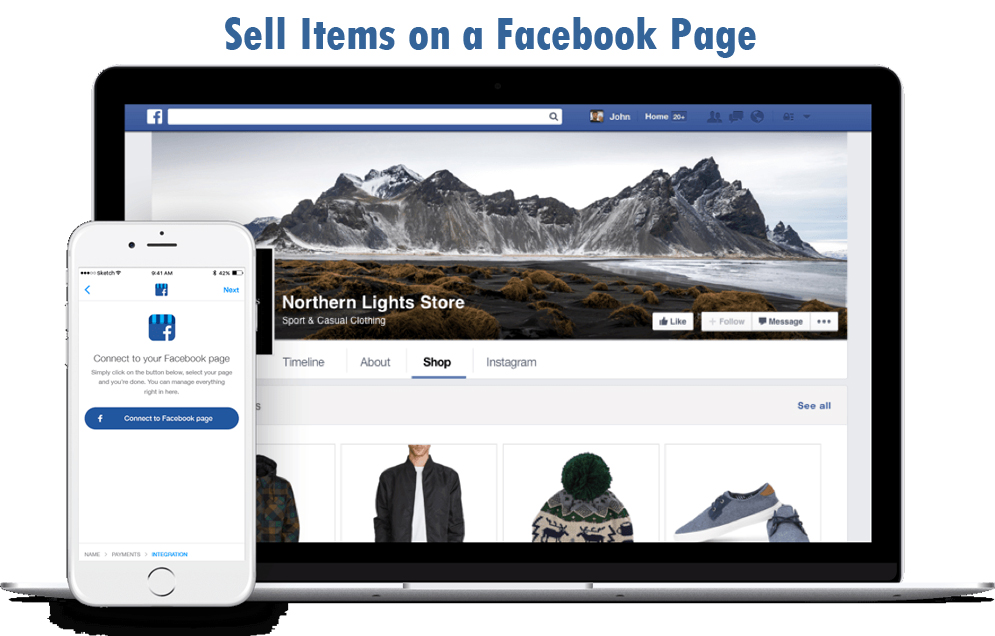
Create Your Facebook Page
Now you know how to sell items on a Facebook page, but you can also create and sell on your own page and not just the Facebook page of others. Here’s how to create yours.
As everyone knows, Facebook is a messaging, entertaining and information site that is used by billions of people all over the world. And with billions of people as members on this platform, it is sure said that you can surely get your business to those billions of people. But the thing right now is, how can i begin to sell items on a Facebook page.
Open Your Facebook Account
Opening your Facebook account is the very first step you have to pass through in getting your business on a Facebook page, as the Facebook account enables you to also become a member of the Facebook site. So, if you are ready to begin on the service that allows you to sell items on a Facebook page, then you will surely need an account to get started.
- Open your account on the Facebook site www.facebook.com.
- On the Facebook application page, fill in your details like your name
- Fill in your email or your mobile number
- You also have to fill in a safe password for the account
- Your gender and date of birth is also required in this application
- Are you done? Then click SIGN UP.
Log in To Facebook
Your account is now open, you should know that. But you still need to log to make use of your account. Have you opened an account? Then you can now log in to make use of it.
- Log in to your open Facebook account on www.facebook.com.
- You will find the login page. Your email or number is needed
- And the account password is also needed.
- Have you filled in your number/email and password? Then click LOG IN.
Now you have gotten a Facebook account, and you also know how to login to this account. you can begin to sell items on a Facebook page. Now there are two things involved, it is either you sell on other pages or create your own page to sell on. I will list out how you can sell on other pages. And without much ado, let’s quickly get started.
- Log in to your Facebook account.
- With the search box on your account homepage, search for pages.
- A list of pages will be shown to you. click on any page.
- You will find a status box on the page. That box is tagged as, Write a post…
- Click on it and fill in the information of the item you would like to sell. Provide the name of item.
- The location of the item
- The price tag of the item
- A title/description of the item.
- Are you done? POST.
Create Your Facebook Page
Now you know how to sell items on a Facebook page, but you can also create and sell on your own page and not just the Facebook page of others. Here’s how to create yours.
- Log in to your account.
- At the top of your homepage, tap on CREATE.
- In the pop-up menu, tap on PAGE.
- Choose the type of page to open and get started.
- Fill in the name of your page
- The category, location, and description of the page.
- You have to provide other necessary information for your page and you can now post your items with the processes above.
Comments
Post a Comment